How do I issue certificates from a spreadsheet?
Put one row per student in Excel or CSV with their name, their email and, if you have it, the completion date, then upload the file to a platform that maps the columns and checks every row. In Certific you review the list, select who completed the course and issue the whole class at once; each student gets a certificate with their own ID and QR code.
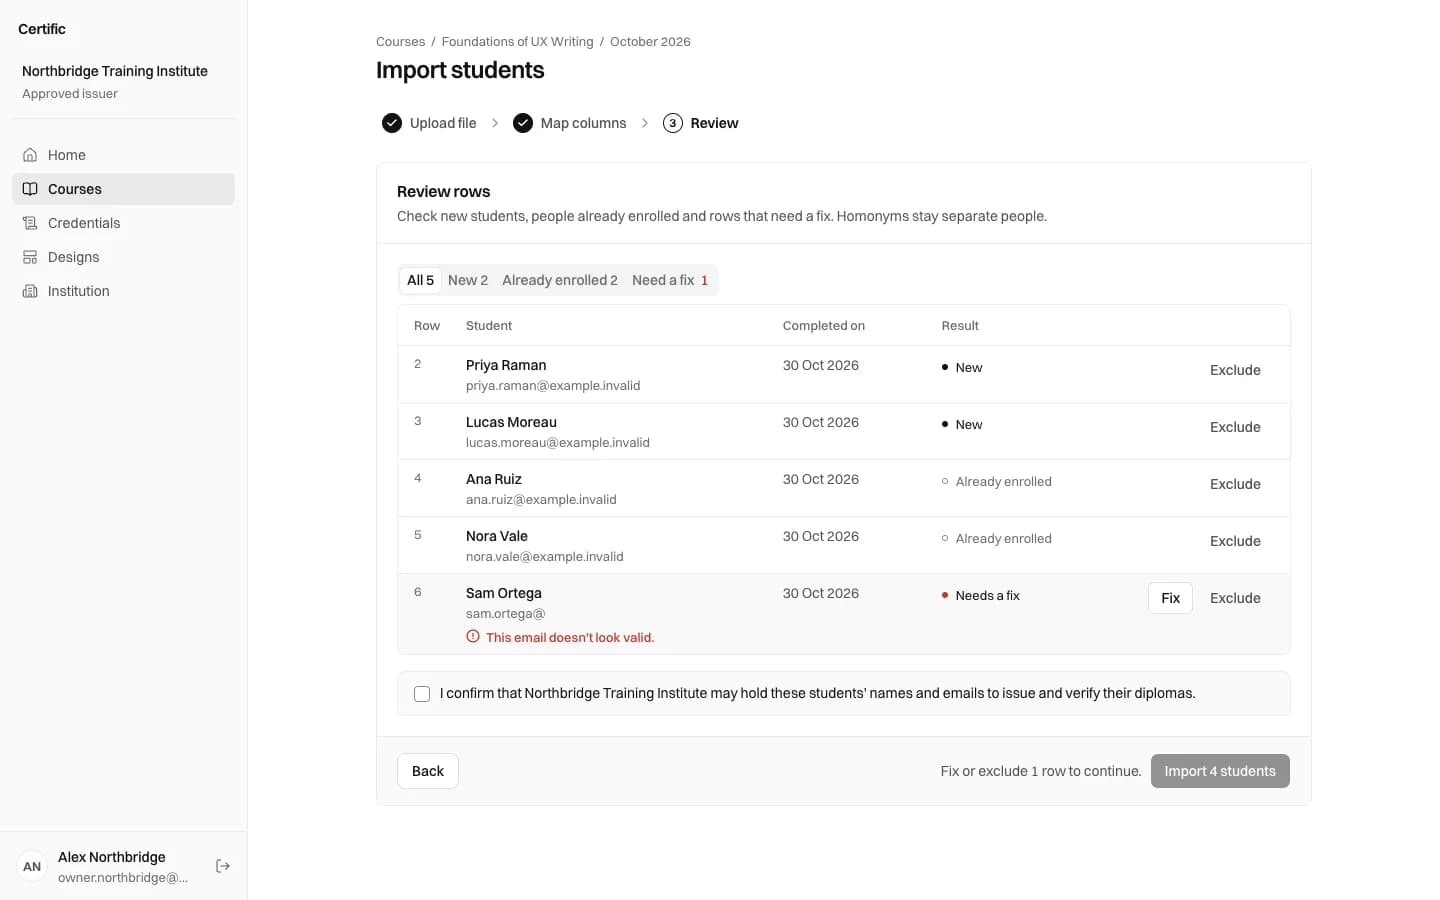
What the spreadsheet needs
- A name: first name and last name in two columns, or the full name in one.
- An email address for each student, to send the certificate.
- Optionally, the date each student completed the course.
- Any other column can stay in the file; you mark it as not imported.
Step by step in Certific
- Create the course and an edition for this class, with its dates.
- Upload the file. Certific reads .xlsx, .xls and .csv files and suggests which column is which; you can change any of them.
- Review the rows. Problems are flagged on the row they belong to, before any student is added.
- Import, and mark who completed the course if the file did not say so.
- Preview the diploma with any student's name, then issue. Each diploma gets its own ID and QR code within seconds.
- Send the emails when the diplomas are ready. Each student gets one from your school, with a button to their diploma.
Mistakes the review catches
- A row without a name or without an email.
- An email that is not valid, or one repeated inside the file.
- Two students with the same name, kept as two people and flagged so you can check.
- A name too long to fit on the diploma.
Importing into the same class again
If you import into the same edition again, the columns start already mapped, and students already enrolled are recognised by their email instead of being added twice.